How to Migrate WooCommerce to Shopify with BulkFlow
BulkFlow helps you migrate your store data directly from WooCommerce to Shopify without manually exporting and importing files.
You can migrate essential data such as products, categories, customers, orders, pages, blog posts, and discounts. We recommend running a Demo Migration first so you can check the results before moving all your data.
Step 1: Connect Your WooCommerce Source Store
Before starting the migration, connect your WooCommerce store to BulkFlow to get the Private Key.
- Open the store workspace menu in BulkFlow.
- Click Create Workspace.
- Select WooCommerce.
- Enter your:
- Store URL
- Consumer Key
- Consumer Secret
- Connect your store to BulkFlow.
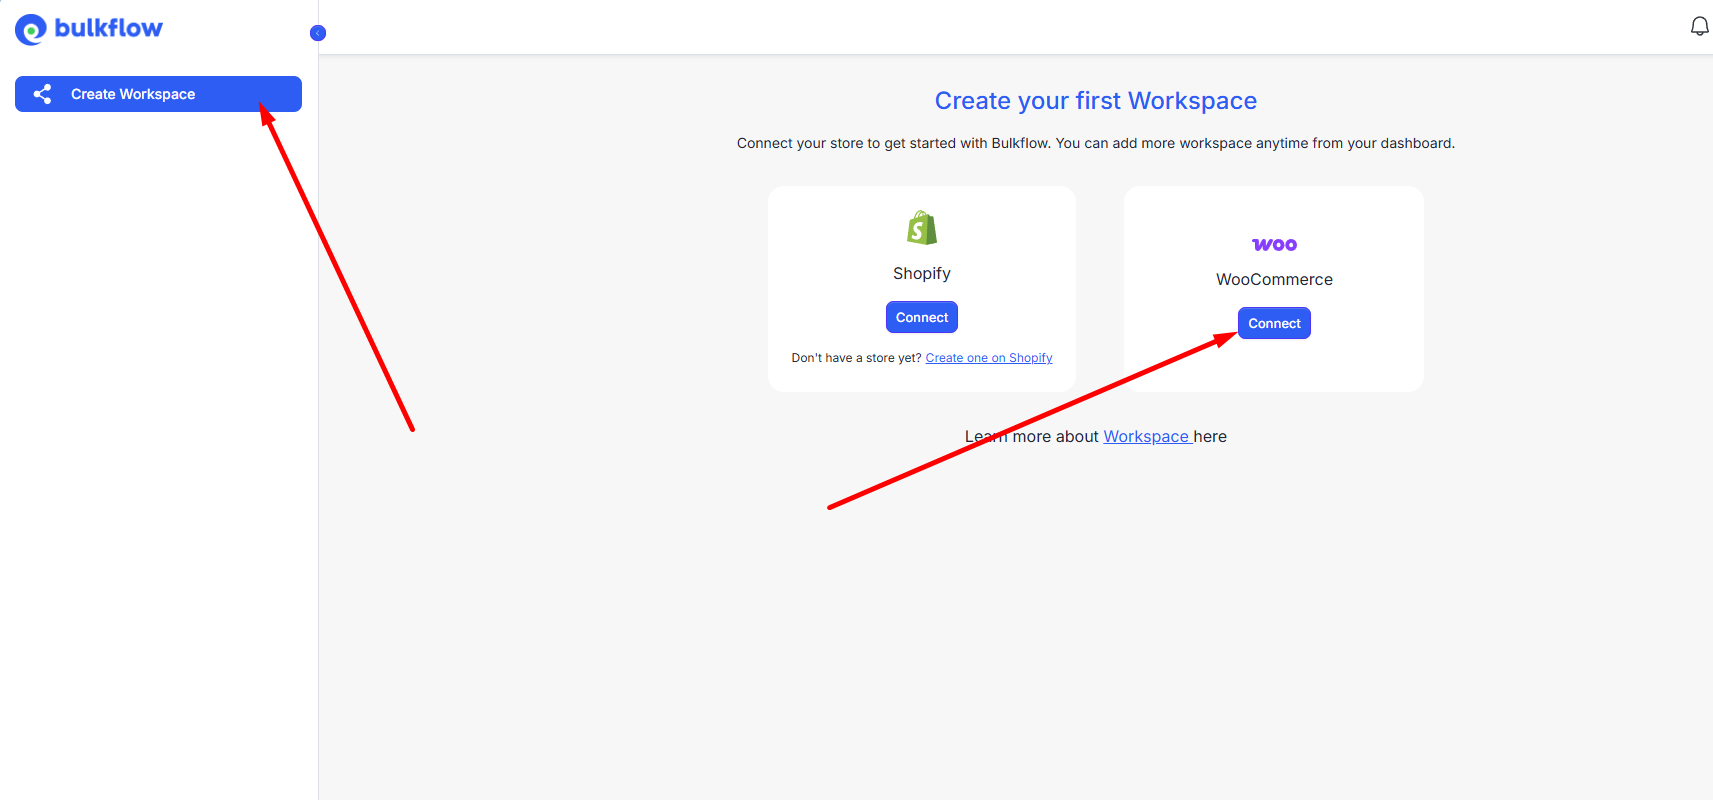
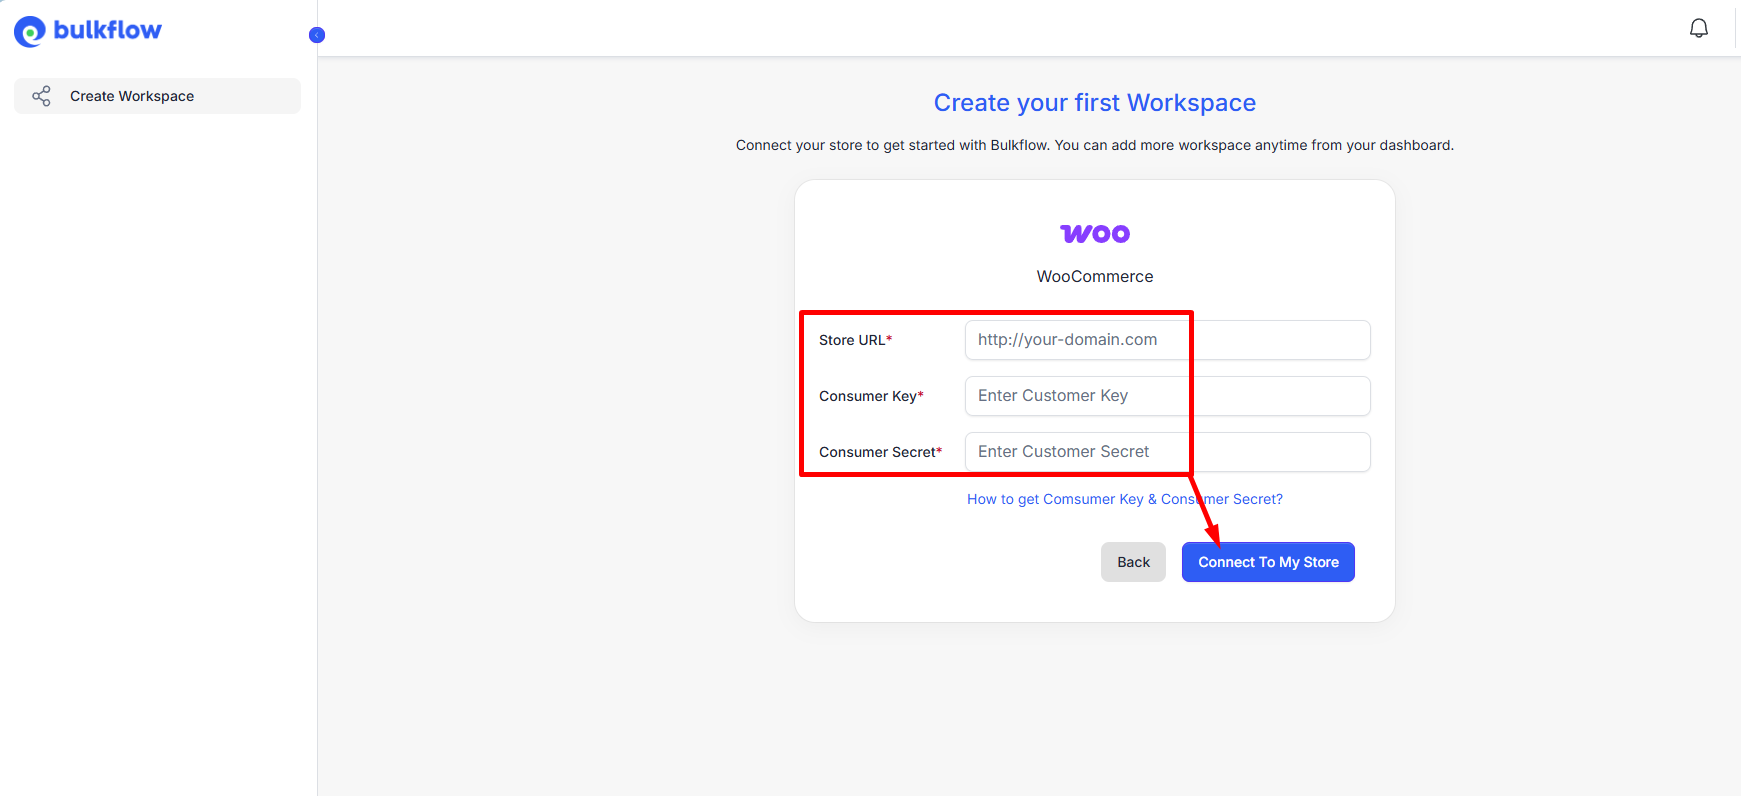
If you have not connected WooCommerce before, follow our WooCommerce connection guide for detailed instructions on generating your Consumer Key and Consumer Secret.
Get Your Private Key
Once your WooCommerce store is connected, you will need its BulkFlow Private Key to start the migration.
Go to: Settings → Account → Private Key
Then:
- Click Generate.
- Copy the Private Key.
- Keep it somewhere safe for the next step.
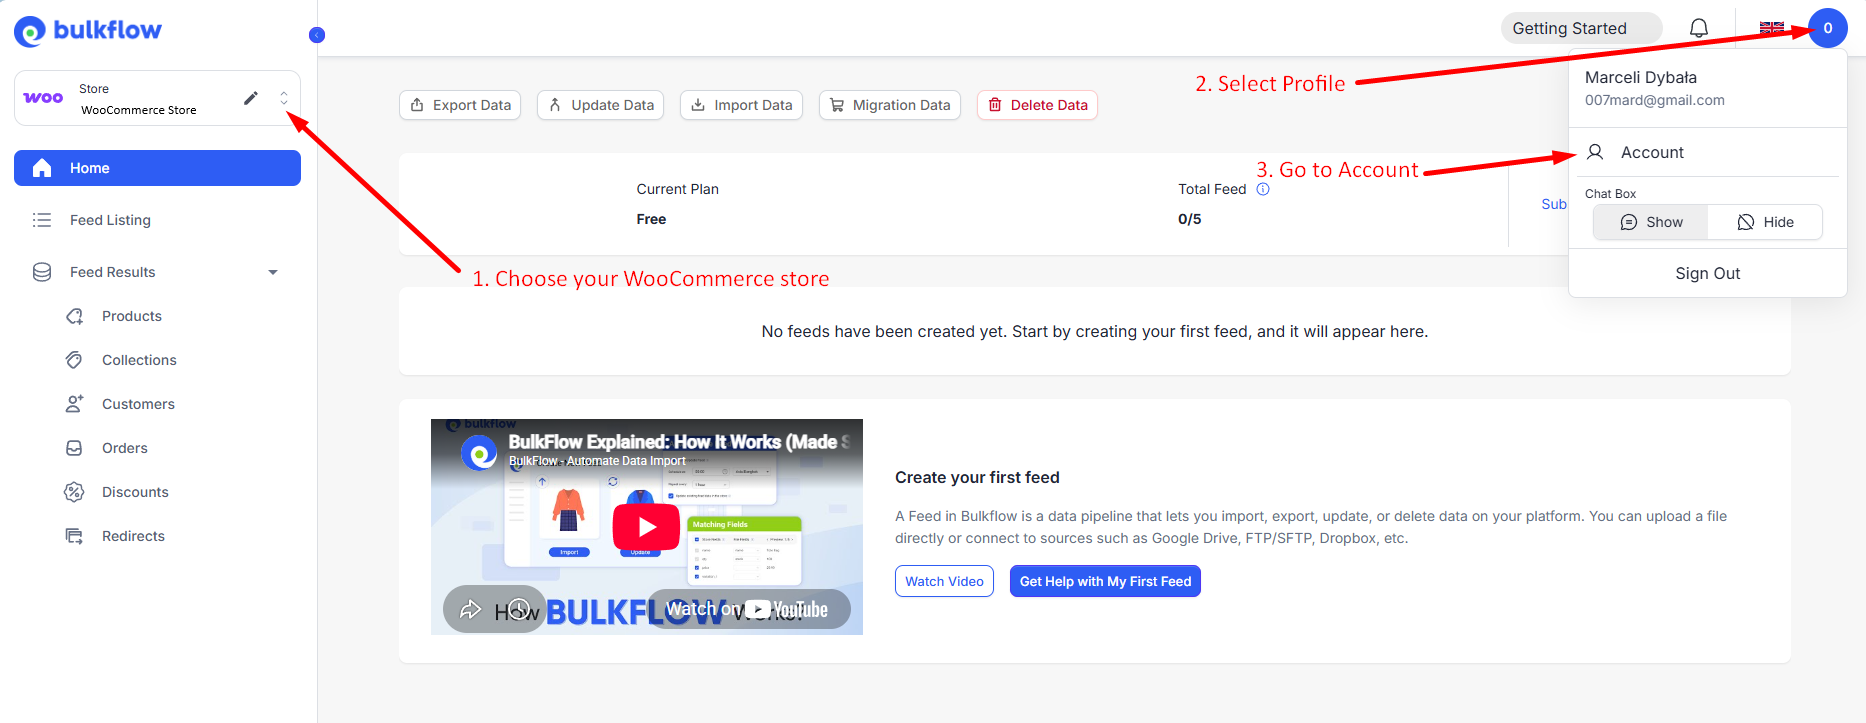
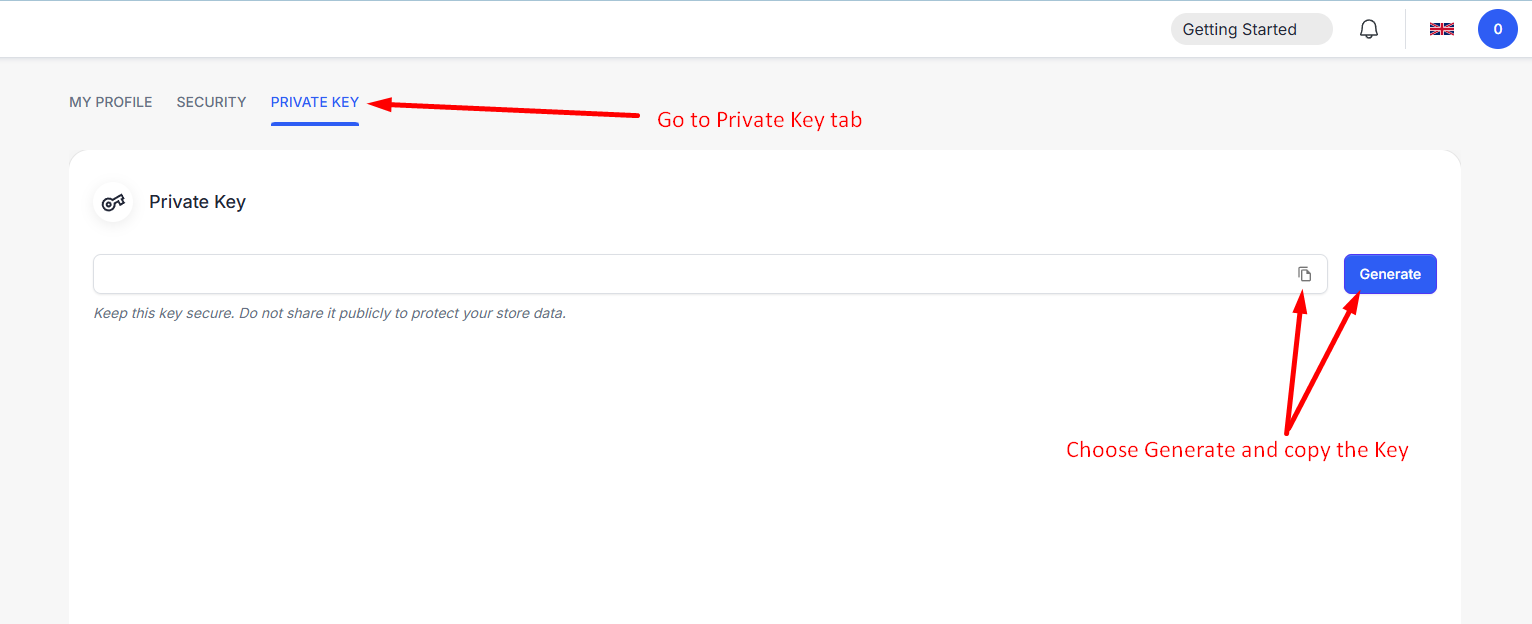
Note: The full Private Key is only displayed once after it is generated. If you leave the page without saving it, you will need to generate a new key.
Step 2: Set Up the Migration in Your Shopify Store
Next, open the Shopify store where you want to receive the migrated data.
Make sure you are working in the correct Shopify store before continuing, as BulkFlow will migrate data into the store currently connected to your workspace.
From the BulkFlow dashboard:
- Select Migrate Data button.
- Enter a name for your migration feed.
- Paste the Private Key you copied from your WooCommerce workspace.
- Click on “Select Stores” button.
- Select the correct WooCommerce store.
- Click Next Step.
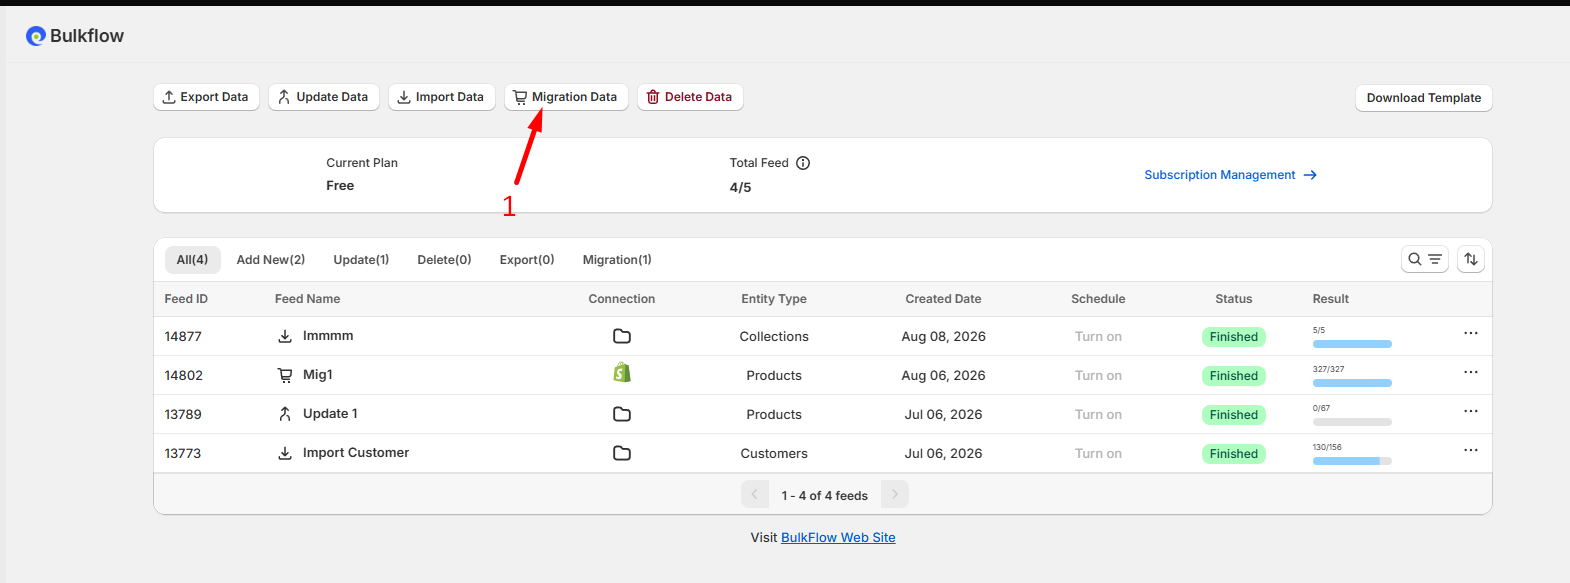
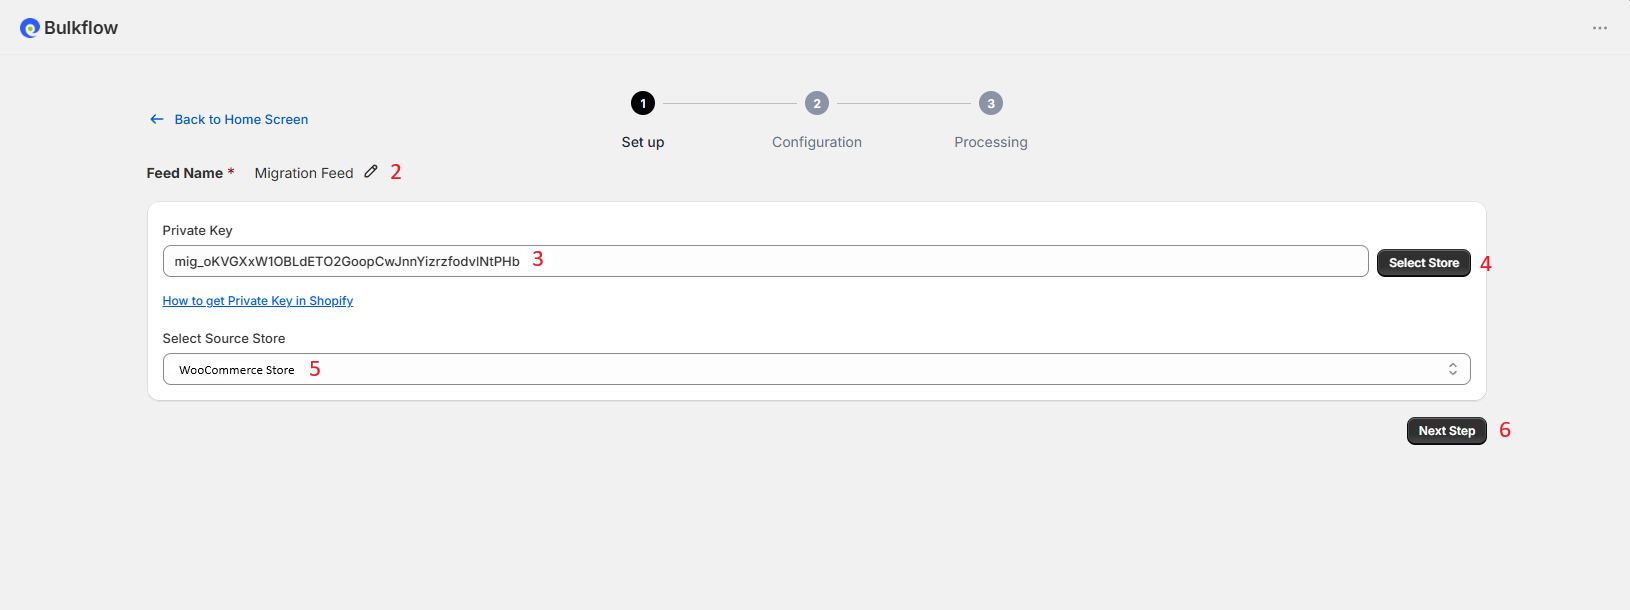
The Private Key allows BulkFlow to identify and connect to the source store you want to migrate from.
Step 3: Configure and Run Your Migration
After selecting the source store, you can choose which data you want to migrate.
Select Your Store Data
Under Select Entities for Migration, choose the data types you want to transfer.
BulkFlow supports:
- Products
- Categories
- Customers
- Orders
- Pages
- Blog posts
- Discounts
You can select multiple entities in the same migration.
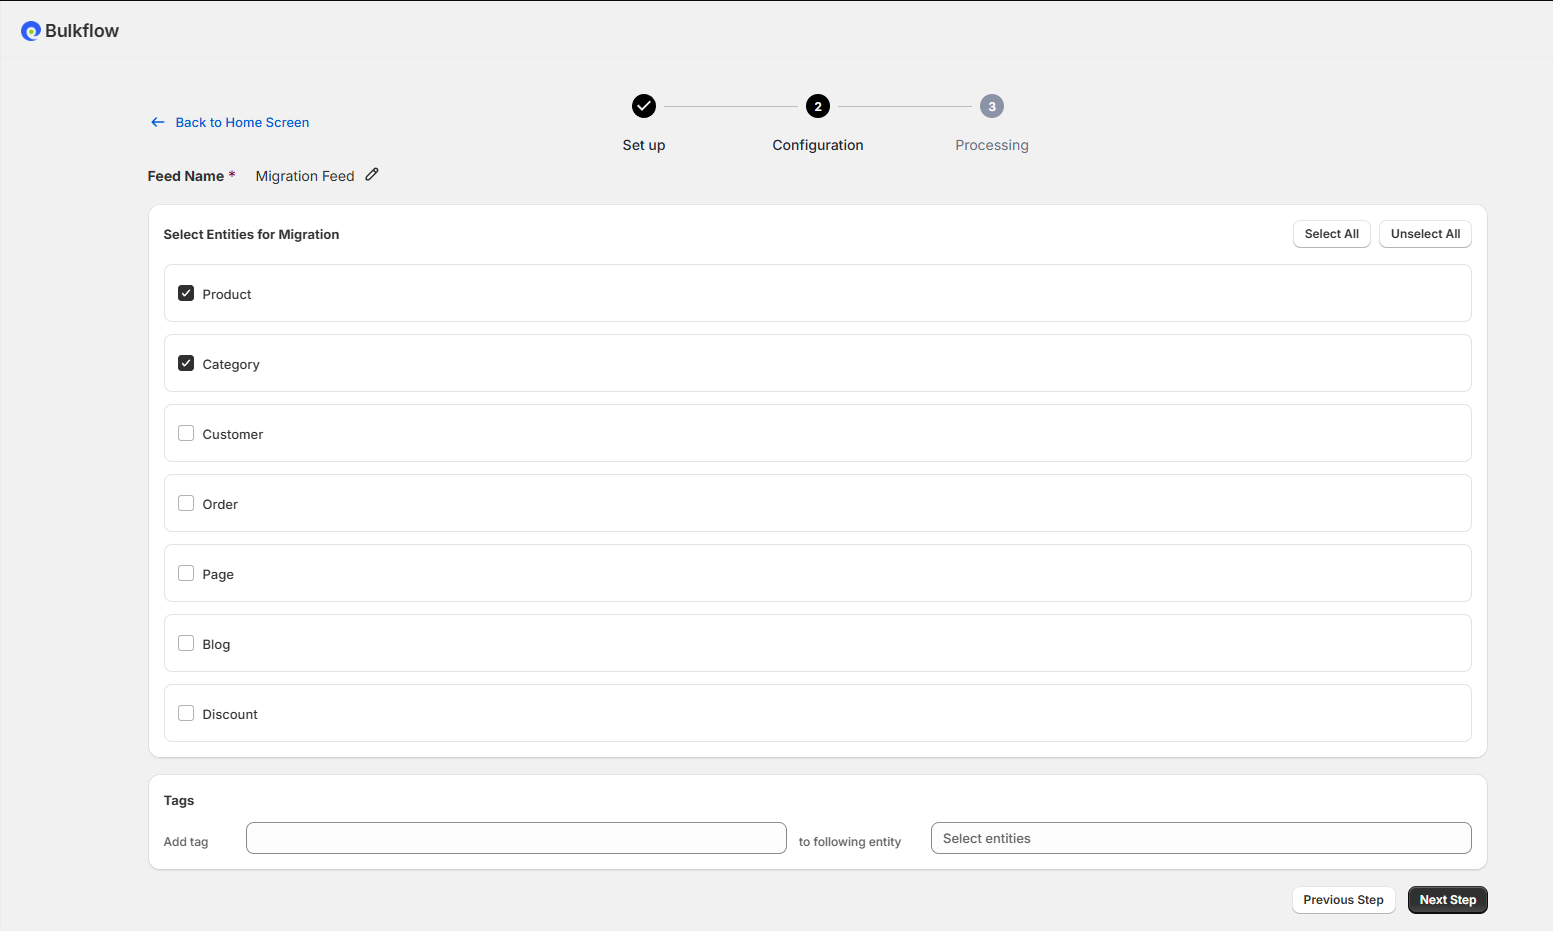
BulkFlow will automatically process them in the required order to help maintain the relationships between your store data.
Once your configuration is ready, click Next Step.
Run a Demo Migration First
Before migrating your entire store, select Demo Migration.
A Demo Migration transfers a small sample of your selected data so you can check how it appears in Shopify.
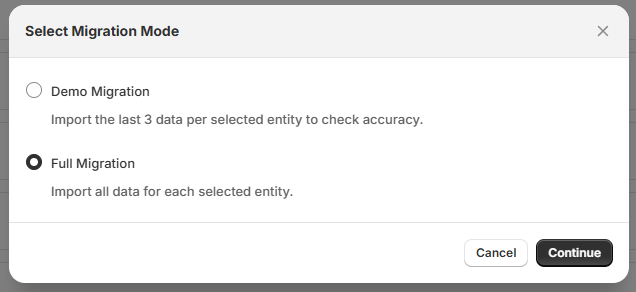
After the demo finishes, review the migrated data in your Shopify store. If everything looks correct, return to BulkFlow and click Import All Data to start the Full Migration.
Run the Full Migration
The Full Migration transfers all available data for the entities you selected.
During the process, BulkFlow shows the migration status for each entity so you can monitor the progress.
You can leave the page while the migration is running. The process continues on BulkFlow’s server, and you can return to the feed later to check the latest status.
Check Your Migration Results
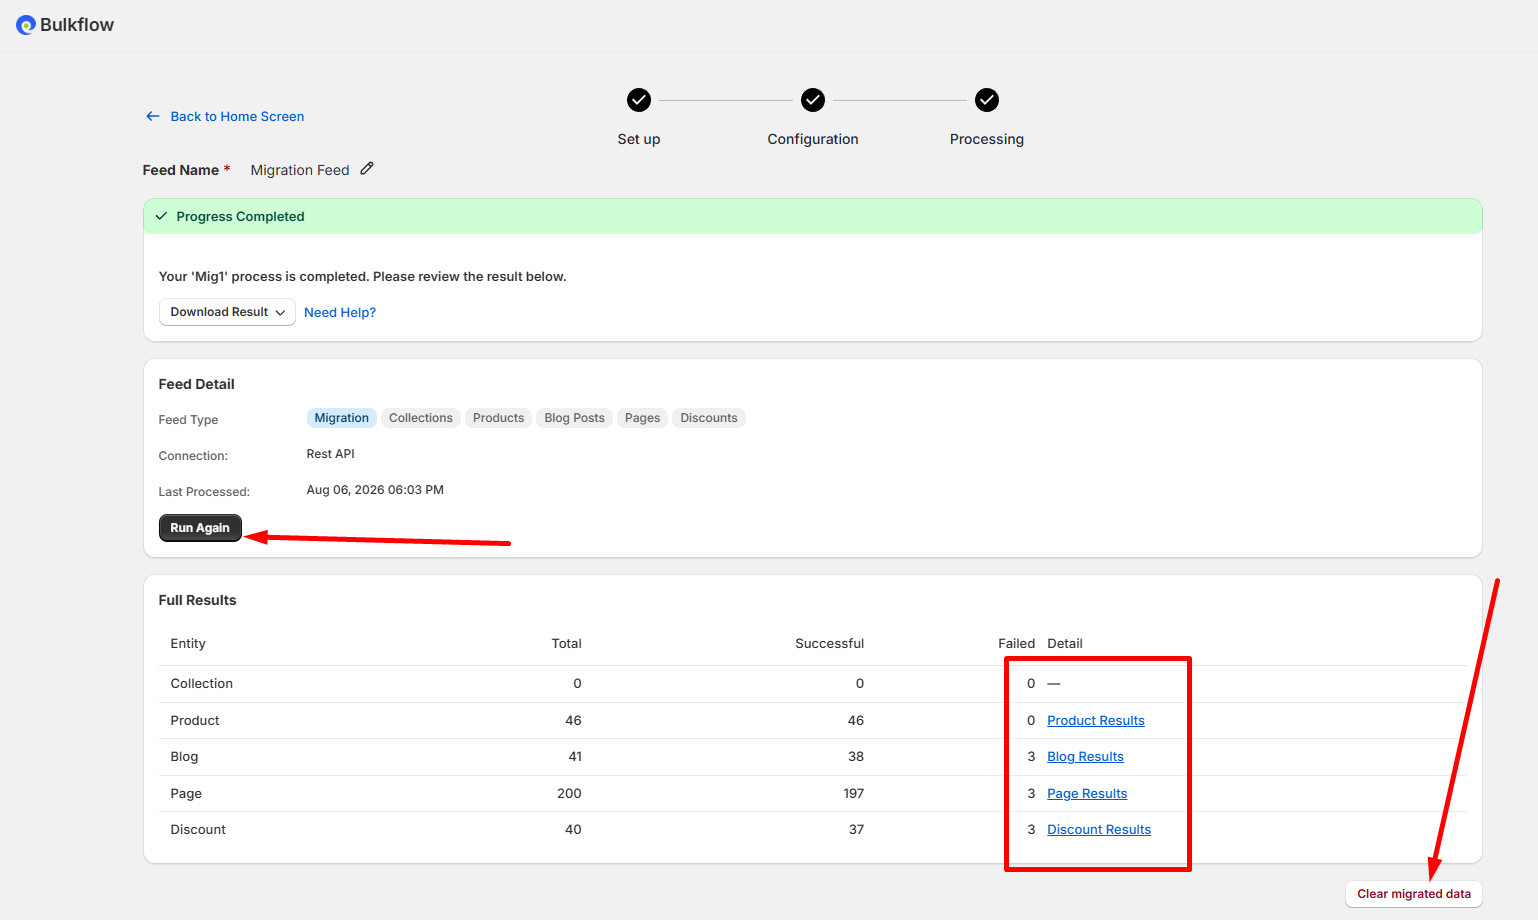
When the migration is complete, BulkFlow displays a result summary for each entity.
You can review:
- Total – total records processed
- Successful – records migrated successfully
- Failed – records that could not be migrated
- Detail – records included in the migration
If any records fail, use Download Result to download the result file and review the error details.
After a Demo Migration, you can also choose:
Import All Data
Run the Full Migration using the same configuration.
Clear migrated data
Remove records created by the current migration if you want to correct the setup and try again.
Important: Clear migrated data permanently removes records created by that migration from your Shopify store. This action cannot be undone.