Many Shopify store owners rely on Microsoft Excel to organize, analyze, and store their eCommerce data. With Shopify Microsoft Excel integration, you can easily export product, order, or customer information into spreadsheets to create deeper analysis and customized reports.
In this article, we’ll walk you through three popular ways to connect Shopify with Microsoft Excel.
Why Integrate Data From Shopify to Excel?
Integrating data from Shopify to Excel is a useful way to streamline your store operations. Here are some key reasons:
- Better data organization: Excel offers a familiar and flexible environment to clean, sort, and structure large volumes of Shopify data, making it easier to manage and understand.
- Enhanced report making: You can leverage Excel’s powerful formulas, pivot tables, and charts to create detailed sales and inventory reports from Shopify data.
- Seamless workflow integration: Excel data easily integrates with other tools and platforms you use daily, allowing smooth data flows across your business operations.
3 Popular Methods for Connecting Shopify to Microsoft Excel
Connecting Shopify to Microsoft Excel helps store owners automate data workflows, enhance analysis, and simplify management. Here are three popular and effective methods to achieve this connection, each with its own benefits and use cases.
Method 1: Manual CSV export
Many Shopify users still rely on the tried-and-true approach of exporting data as CSV files from Shopify and importing them into Excel for analysis or bulk manipulation. This method is especially useful for one-time migrations or occasional updates. While it lacks automation, it’s straightforward, widely supported, and doesn’t require additional software or setup.
Method 2: API custom Integrations
For businesses with specific needs, developers can use Shopify’s GraphQL Admin API to build custom integrations that programmatically fetch data from Shopify and insert it into Excel files or systems. This approach allows complete customization of data flows and is suitable for large-scale or complex workflows requiring full control over the integration process.
Method 3: Using third-party solutions
There are many third-party solutions that you can use, including Excel add-ins like CData or Devart, which create a live connection between Shopify and Excel. After setup, you can pull Shopify data directly into Excel sheets and even push updates back to Shopify. This method is ideal for users who want real-time, two-way access without leaving Excel’s interface.
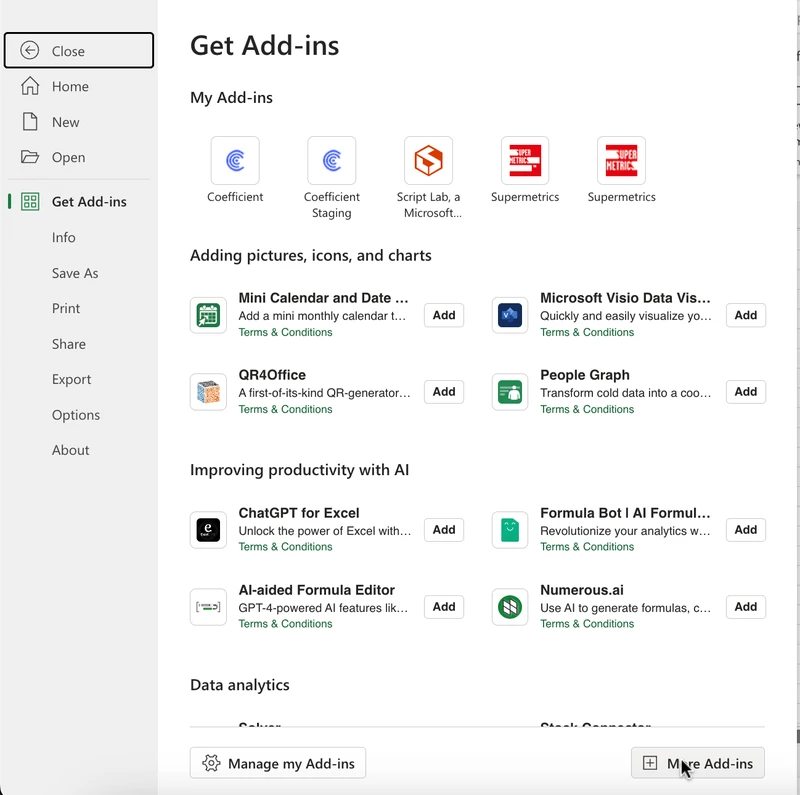
Another option is automation tools such as BulkFlow. While less direct than Excel add-ins, BulkFlow is quick to configure and perfect for users who want simple automation without coding. It enables you to schedule bulk imports and exports, update only changed data to save time, and customize which fields to include in your files.
BulkFlow supports a wide range of data types beyond just products and orders. You can import and export products, customers, orders, pages, blog posts, discounts, metafields, and metaobjects from different formats like CSV, Excel, Google Sheets, Dropbox, FTP/SFTP, etc. This makes BulkFlow a versatile solution to streamline your Shopify data management efficiently and reliably.
Guide to Shopify Microsoft Excel Integration with BulkFlow
Using BulkFlow to integrate Shopify with Microsoft Excel makes exporting your Shopify data to Microsoft Excel simple, flexible, and efficient. Here’s a step-by-step guide to get started.
- Step 1: Set up your BulkFlow account
- Step 2: Create a new export feed
- Step 3: Configure your data export
- Step 4: Run the export
Step 1: Set up your BulkFlow account
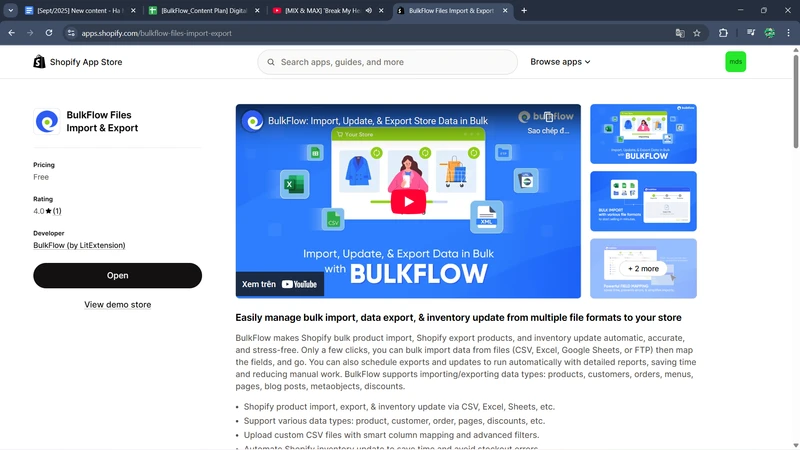
Before doing anything, you need to create a BulkFlow account. Once registered, connect BulkFlow to all of your Shopify stores. Or, you can directly install the BulkFlow app directly from your Shopify Admin and grant it the necessary permissions.
When you’re done, BulkFlow will automatically create a workspace where you will manage all your data feeds and integrations.
Step 2: Create a new export feed
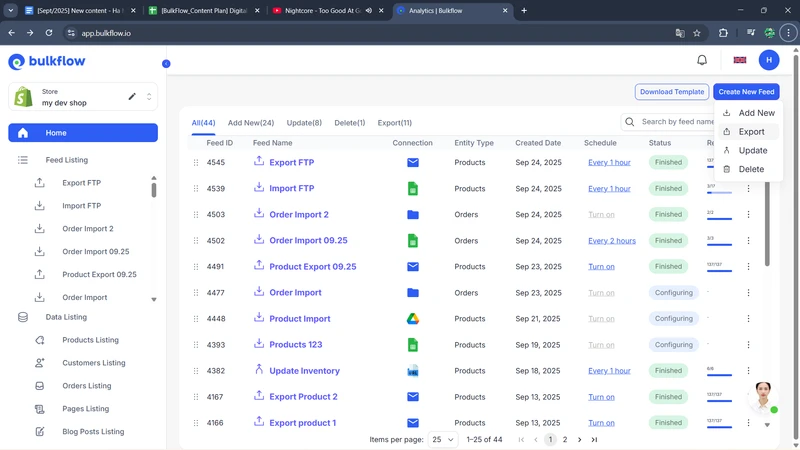
Next, in your BulkFlow dashboard, click Create New Feed > Export.
For this new feed, give it a name and choose your export target: send to your email or your FTP/SFTP server.
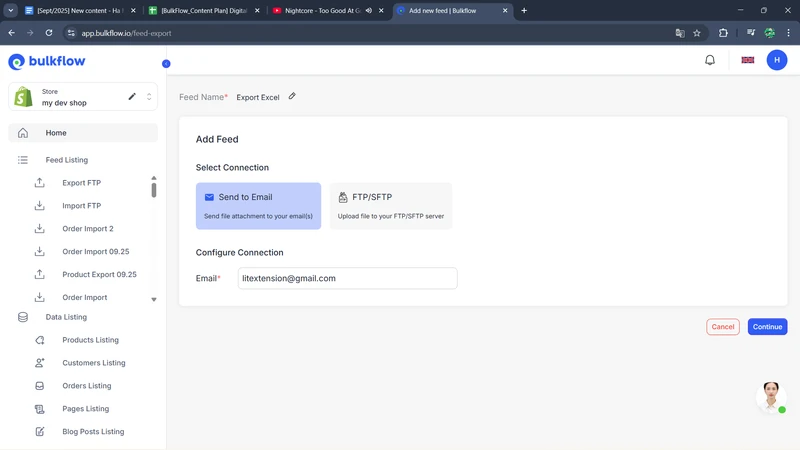
Click Continue to move on.
Step 3: Configure your data export
In this step, first, BulkFlow allows you to configure presets. You can choose an existing preset (if you have any) or save your current setting as a preset for quicker reuse later. You can also choose the export file format between Excel and CSV, depending on your needs. In this case, let’s choose Excel.
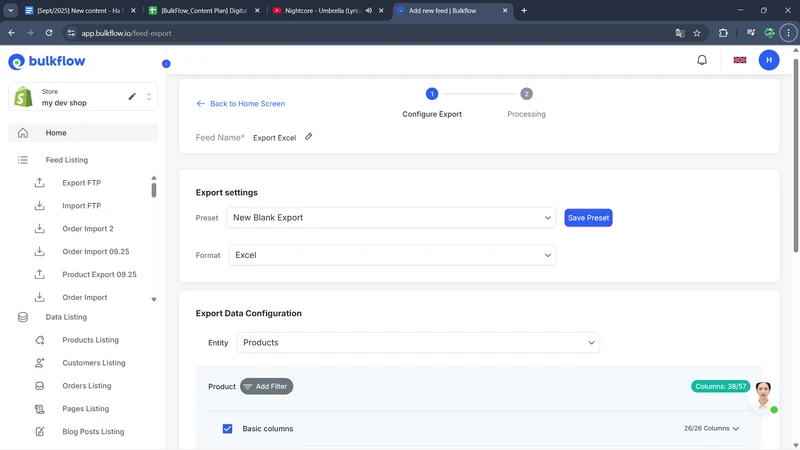
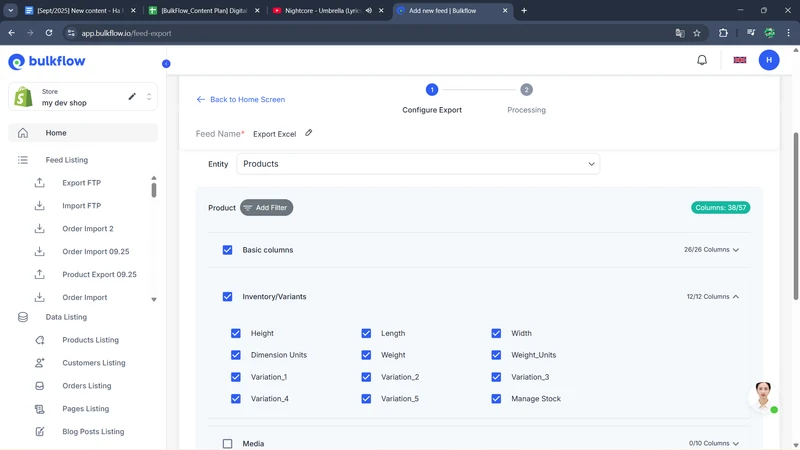
Next, you need to choose the data entity to export; the options include exporting orders, products, customers, pages, blog posts, discount codes, and metaobjects. Depend on the entity. BulkFlow allows you to hand-pick specific fields you want to focus on in the export. If necessary, you can apply filters to narrow down the data, for example, by date range or status.
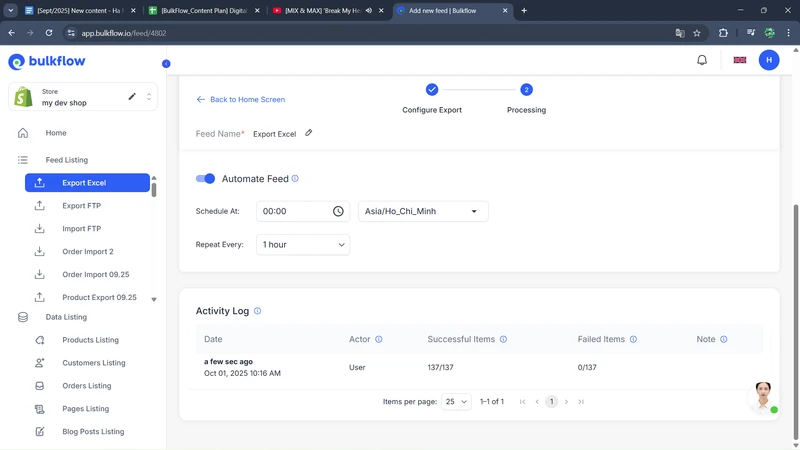
Finally, you can set up the automation schedule. BulkFlow lets you select how often the export runs, ranging from hourly to daily, to keep your data fresh without constant manual effort.
Step 4: Run the export
Once your export is set up, simply click Export to start the process. BulkFlow will export the file and send it to your chosen destination, where you can download it to your device.
With the Excel file in hand, you can analyze your Shopify Excel data, create charts and graphs, and write insightful reports to help guide your business decisions.
On BulkFlow’s export feed, you can also adjust your export schedule anytime to fit your workflow and monitor export results through activity logs, giving you full control over your data integration process.
Common Pitfalls & Best Practices For Smooth Shopify Excel Import
Shopify Microsoft Excel integration can greatly improve your workflows, but some common challenges may arise. Here are key pitfalls to watch out for and practices to avoid them:
Managing large data volumes
Shopify’s default tool can struggle with very large datasets, causing slowdowns or export failures. To avoid delays or failures, it’s best to break your export into smaller batches.
Still, if you want to handle large product catalogs or extensive store data, consider using robust third-party apps like BulkFlow that are designed to manage big volumes smoothly without slowing down your workflow.
Reducing manual export work
Manual exports and data handling are time-consuming and error-prone when relying solely on Shopify’s built-in features. You can consider automating exports with apps that support scheduling, such as BulkFlow, which lets you keep your data updated without constant manual effort.
Follow a clear naming format
When exporting multiple files or splitting large exports, use consistent and descriptive file names to keep your data organized and easily accessible. Good naming conventions make it easier to find, track changes, and avoid confusion when managing export files over time.
Test before large-scale exports
Before running large or complex exports, test the process with smaller datasets to confirm your settings are correct. This helps prevent costly mistakes and ensures your exported data fits your intended format and use case.
Shopify Microsoft Excel Integration – FAQs
Can I automatically export Shopify orders to Excel?
Yes, you can use third-party automation tools like BulkFlow to schedule automatic exports of Shopify orders to Excel files. This keeps your data up-to-date without manual exporting.
Is CSV better than Excel for Shopify import?
CSV is the most universally supported format for Shopify imports and exports due to its simplicity and compatibility. However, Excel files offer more formatting and data manipulation options outside of Shopify, so it’s the better option for Shopify imports.
What’s the easiest way to integrate Shopify with Excel?
Using third-party tools like Excel add-ins (CData, Devart) or Shopify apps (BulkFlow) is among the simplest methods that require little technical knowledge. They provide an easy-to-use interface with powerful automation features, perfect for managing Shopify-Excel data transfers efficiently.
Conclusion
Shopify Microsoft Excel integration lets you bring store data into powerful spreadsheets for seamless analysis and reporting. With orders, products, inventory, and customer details flowing into Excel, you can build dynamic dashboards, analyse key metrics, and make smarter business decisions with ease.
When paired with third-party solutions like BulkFlow, you can automate this process end-to-end, saving time and reducing errors. Start integrating today and unlock the full potential of your Shopify data inside Excel.


