Managing Shopify collections is fundamental to creating a user-friendly and organized storefront, but the process can become incredibly tedious. Manually creating, updating, and populating dozens or hundreds of collections is a significant time investment that pulls you away from growing your business.
This is where a bulk management workflow becomes essential. A proper Shopify import collections process can transform hours of manual clicks into a task that takes just a few minutes.
This guide provides an expert, clear path to mastering your collections. We’ll cover the process of using Shopify’s native tools and provide a step-by-step, instructional walkthrough on how to efficiently import and export collections using BulkFlow, saving you time and ensuring perfect organization.
Can I Import & Export Collections to Shopify?
This is one of the most common questions for store owners looking to scale or migrate their operations. The answer depends heavily on which action you want to take with your data.
In short, yes, Shopify sellers can import collections using CSV files through the Shopify native feature or use third-party tools like BulkFlow. You can include a column in your Shopify import files to assign a product to a single new manual collection during the import.
However, the Shopify native collection import is kinda limited. It cannot create Smart Collections, update existing collections, or assign products to multiple collections at once.
As for how to export Shopify collections, by default, Shopify doesn’t support exporting collection data in CSV format. You can export only products, but not collections, using Shopify’s native feature.
Thus, for any true bulk management, a third-party app is not just recommended – it is essential. These apps are designed specifically to handle the import and export of collections, providing you with the control you need.
How to Import and Export Collections Using the Shopify Admin?
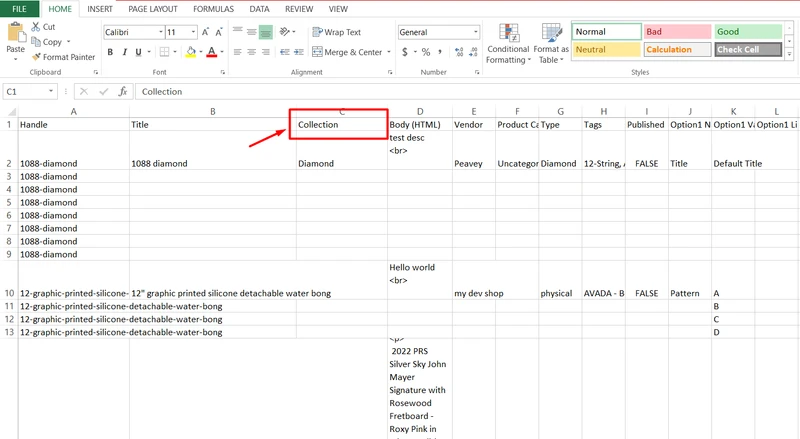
To successfully import collections to Shopify, you must first export your products into a CSV file that follows the standard structure of Shopify, then add a new column named “Collection” in that file.
This column will hold the name of the collection you want each product assigned to. Remember that Shopify matches these names exactly, so capitalization, spaces, and spelling matter.
Here is how to import your collections using Shopify’s native feature:
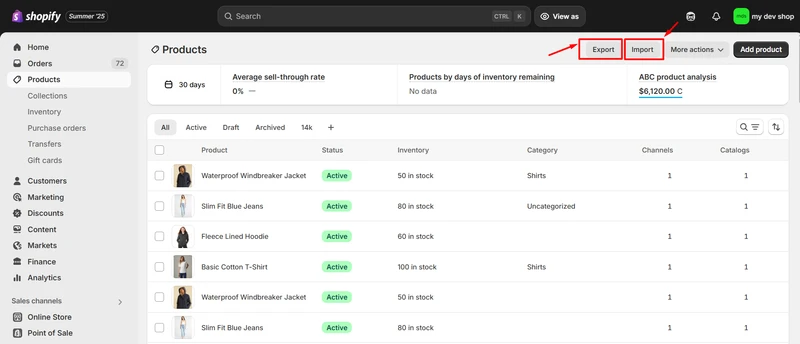
1. Export your products: In the product page of your Shopify admin, click Export to download your current products as a CSV file.
2. Add a Collection column: Open the CSV in a spreadsheet editor, like Excel or Google Sheets. Create a new column titled Collection (with a capital C). For each product, type the exact name of the collection it should belong to. If the collection doesn’t exist, Shopify will automatically create it as a manual collection. So if you want your collections to use custom settings, you’ll need to adjust them manually after the import.
3. Import the updated products & collections file to Shopify: Go back to your Shopify admin, click Import, and upload the updated CSV. Select Override existing products to apply your changes, then click Upload.
4. Check your work: Once the import is complete, head to the Collections section in your admin. You’ll now see your products grouped under their assigned collections.
Please note that each import allows you to assign a product to only one collection. If you want a product in multiple collections, repeat the process using a different collection name in the CSV and upload again.
How to Export & Import Collections to Shopify with BulkFlow?
If you’ve just learned how to use Shopify’s native CSV feature to assign products to collections, you might be thinking, “Is there a faster, more flexible way to do this?” That’s where BulkFlow – Files Import & Export comes in.
Instead of re‑uploading CSV files every time you want to add products to a new collection, BulkFlow lets you create and assign products to multiple collections at once – no more repetitive imports, just one smooth process.
To proceed with Shopify import collections, you’ll import them alongside your products. This makes it useful whether you’re adding new products to Shopify or updating existing ones. Let’s get into it.
Here’s how to use BulkFlow to simplify your Shopify collections import:
Step 1: Install BulkFlow for Your Shopify Store
First, head to the Shopify App Store, search for BulkFlow or you can click here, and click Install.
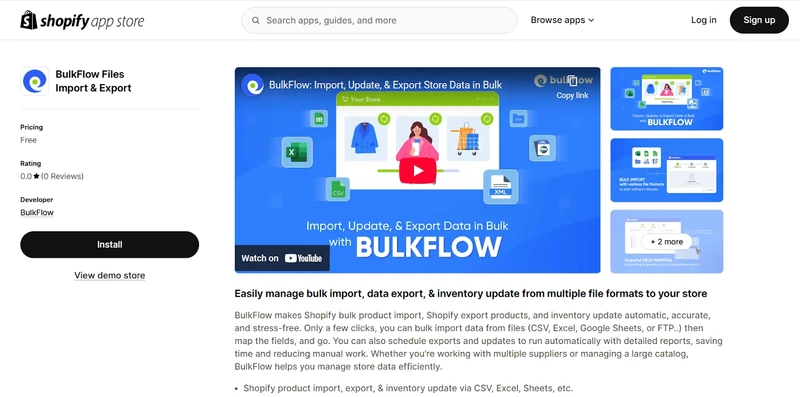
Approve the permissions so BulkFlow can access your store data. Once installed, you’ll land on the BulkFlow dashboard, ready to set up your first Shopify collections import.
Step 2: Prepare your Shopify import file
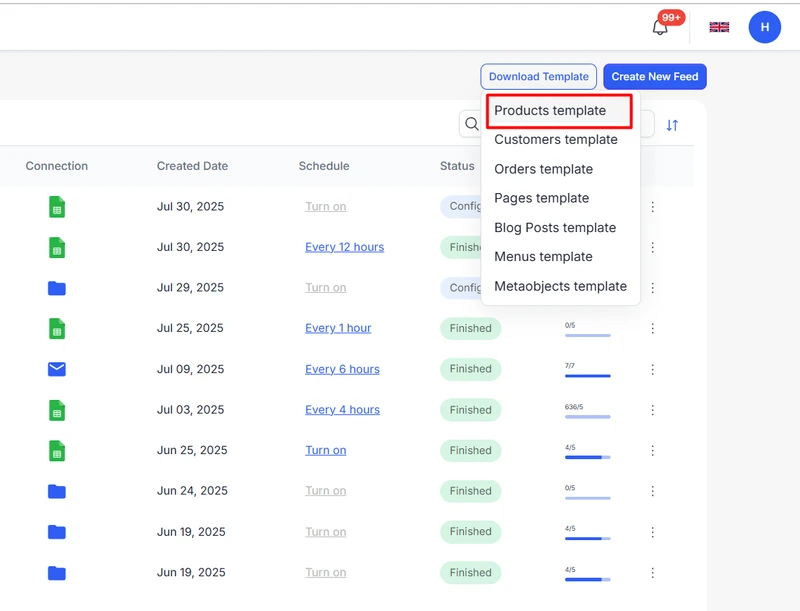
BulkFlow makes structuring your data simple. From the dashboard, click Download Templates and select the Products Template. Fill in the sheet with your new or existing product details, such as titles, descriptions, prices, inventory, and more.
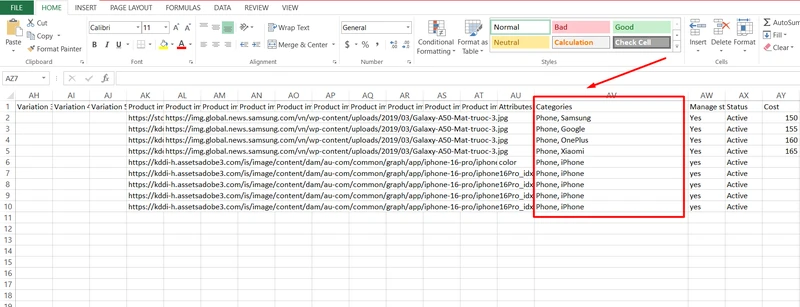
Next, head to the Categories column to assign collections to your products. Unlike Shopify’s native CSV, BulkFlow lets you add multiple collections for a single product by separating them with commas.
For example: Phone, iPhone. This way, BulkFlow will create the Smart Collections in your Shopify store and you can organize products across several collections in one go, saving time and avoiding repeated imports.
Step 3: Create a feed for your import
Once your file is ready, it’s time to set up your Shopify products & collections import in BulkFlow.
Go to Create New Feed → Add New. Give your feed a clear name (e.g., “Collection Import 1”), and if you’re updating products that already exist in your store, toggle on “Update existing data in the store.”
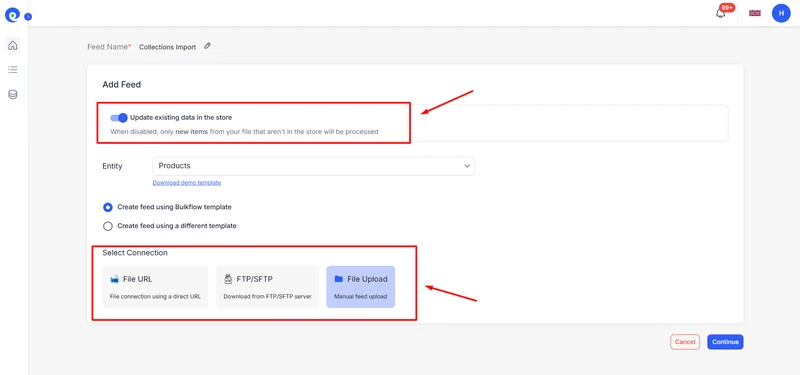
Next, select Products as your data entity. BulkFlow supports multiple connection methods for importing your file, File URL, FTP/SFTP, or direct file upload, so you can pick the option that best fits your workflow.
Step 4: Add your products & collections file
Next, upload or connect your file based on the connection method you’ve chosen in the previous step. Once done, click Next step.
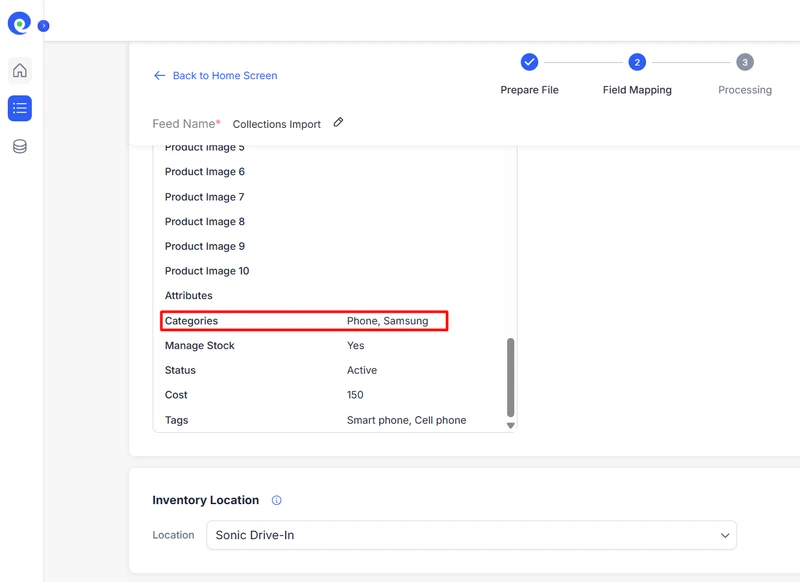
BulkFlow will then take you to the Field Mapping page, where you can preview how your data matches Shopify’s fields. This step ensures your product data and collections are imported correctly.
Step 5: Run and automate your Shopify collections import
Once everything looks good, it’s time to bring the data into Shopify. Click Next Step to start importing collections to Shopify. BulkFlow processes everything, and you’ll get a confirmation when it’s done.
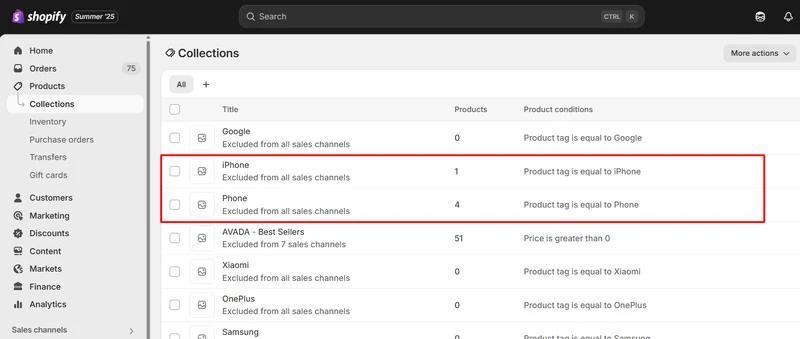
Then, head to your Shopify Collections page, and you’ll see your products neatly assigned to the right collections.
Need ongoing updates? If you use the connection method as File URL or FTP/SFTP, you can utilize Automate Feed to schedule imports, which is great for keeping collections and products in sync without lifting a finger.
And that’s it – you’ve just leveled up your importing collections to Shopify process. Whether you’re importing or updating collections in bulk, BulkFlow makes Shopify import collections and other data fast, reliable, and scalable.
Shopify Import Collections – FAQs
Do I need to import my products before I import my collections?
Not necessarily. You can import products and assign them to collections at the same time by adding a “Collection” column in your import file. This works whether you’re using Shopify’s native CSV feature or a third‑party tool like BulkFlow.
Can I add a product to multiple collections in a single import?
With Shopify’s native CSV, no, you can only assign one collection per import. However, using BulkFlow, you can assign multiple collections to a single product in the Categories column by separating them with commas.
What happens if my import file has errors?
Errors are common, especially with large files. Import apps like BulkFlow will not just fail silently. It will process the valid rows and then provide you with a detailed error report or a results file. This report typically lists the rows that failed and provides a specific reason (e.g., “Product with handle ‘old-product’ not found”). You can use this log to correct the errors in your CSV and then re-import only the corrected rows.
Can I update existing collections in bulk using this method?
Yes. This is one of the most powerful uses of an import/export workflow. To update existing collections, ensure your CSV file contains a Handle column with the handles of the collections you want to modify. The app will use this handle to find the matching collection in your store and then overwrite the data in the other columns (like Title, Body (HTML), or Image Src) with the new information from your file.
Wrap up
While Shopify’s native CSV tool gets the job done, apps like BulkFlow – Files Import & Export take it a step further. With the ability to create and assign products to multiple collections at once, update existing data, and even automate recurring imports, BulkFlow makes managing your store’s data easier than ever.
If you’re looking to save time, reduce repetitive work, and keep your catalog perfectly organized, give BulkFlow a try. It’s a smarter way to handle Shopify import collections and a game-changer for growing your store with ease.


